Showing posts with label Glen Innes School. Show all posts

Saturday, 2 February 2019

Start of the year: teaching values to set your expectations for the year


In my opinion, there are two crucial things to begin the school year with - team building activities and values. It is these two things that help students to settle into their new classroom, establish connections with their peers and understand the expectations.

Beginning the year with values (either school or the Key Competencies in NZ) is absolutely imperative for a number of reasons...
  1. It sets up expectations for how you want your students to work and behave for the year.
  2. It will be useful when creating your class contract or treaty.
  3. It can be used to create a meaningful wall display. It is something that the students would have had an active role in creating, which can be used as a point of reference and a constant reminder of the values and expected behaviour your the classroom.
  4. Is a great way for students to start learning how to work collaboratively.

This year at Glen Innes School, we have introduced our brand new school values. They are Responsibility, Effort, Ako, Commitment and Honesty... aka REACH. Since it was our first year with school values, it was super important that students made a connection to them. I expect my students to become role models to the rest of the school in showing the REACH values.  Here is how I have taught them to my classroom.

Bus stop rotation

The purpose: This activity helped students to recognise what they already knew about each of the school values - aka their prior knowledge. It is also a great way to maintain enthusiasm and energy, as students are at each station for a short period of time, and have to get up and move to each station.

Preparation: I created a Google Doc which I printed out as a3 and double sided. For each REACH value, there were four sections: What is it? Definition in a sentence, What would happen if we did use (value)? and What would happen if we did not use  (value)? Each 'value' is stationed at a specific group of desks.

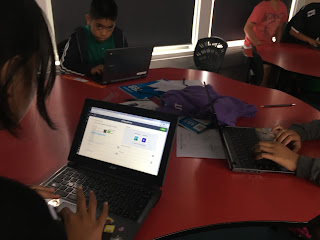
'Bus Stop' activity in action
Instructions 
  1. Students get into groups and begin at a specific 'station', where a large sheet of paper and some questions/prompts on it (or just one question/prompt if you want). 
  2. Students work collaboratively to record their responses to the first question. 
  3. After about 3-4 minutes, students get up and move to the next 'station'. 
  4. Then, students read what the previous group has written, and adds their own ideas to the first question. If they feel they can, they move to the second question on their new sheet. 
  5. This cycle continues until the teacher feels the students all have shared enough ideas and they have a good understanding of the topic.
  6. Then come together as a classroom to have a conversation about what they can remember about each value.

Class discussion of the values 

Students' suggestions of values
Since it was the first time using these class values, we also had a discussion about their general thoughts on each value, as well as values that they felt were also really important. It was interesting that some students felt like commitment was not that important, as it could be tied into responsibility and effort. Students also spoke about Attitude, Respect, Perseverance and Courage. I was very proud of my students for being able to think critically and come up with additional values that could be used in our classroom. As a side note, students will soon come up with a response to the values and propose the addition of Courage into our school values (which I think is awesome!).

What does each value 'look' like?

After the bus stop activity, the class came together to think about how we could show our school values in the classroom. Students had to share their ideas on a collaborative Padlet, which was displayed on our Activboard. For this task, I let students work in peers. I explained that students would need these ideas for the next task.

Made with Padlet

Walking the walk

Next, in groups of around 6, students were tasked with staging photographs which showed the students using each value. I also told them that they could edit them with speech and thought bubbles to make each value clear.

Some of my students photos to show our school values

Creating a DLO 

A DLO (Digital Learning Object) is Manaiakalani speak for 'creating something to show what you have learnt'. Since a lot of students haven't done this before, the school values lessons are a great way to introduce DLOs. Students work in groups of 3 to create a DLO that explains their understanding of the school values. For each value, students MUST

  • Have their own explanation of the value (use the bus stop activity and Padlet to help them)
  • Include a their photo that shows the value in action (they can add in thought or speech bubbles to make the value more explicit)
  • Explanation of why the value is important.

Quick plenary

As a second form of the 'bus stop' activity, students share what each value means. For this activity, cut up coloured paper (a different colour for each value) into strips. Again, I created stations for each of the values, and included a new value - courage, to the task. Students had to write their ideas in big letters so that it could be easily seen on the wall. 

This task is great because it serves as a plenary AND you can use it for your wall display, saving you from writing or typing them out yourself. Also, having the students write their ideas themselves makes the wall display more purposeful and meaningful.


Make it a wall display


Make some lettering, print out the photos and staple everything onto your wall. And there you have it, your first, purposeful and student-created wall display!

Our values wall display. Next to it is our class jobs and class dojo rewards and consequences (we came up with this as a class). Underneath those will be our class contract.

What's next?

Now you can use your lessons and wall display to help create your class contract or treaty. You can also refer back to your wall display to reinforce expectations in your classroom.


Tuesday, 29 August 2017

Dealing with conflict in the classroom


This term has seen some significant changes in my classroom. Due to an almost school-wide reshuffle, my classroom lost 4 students and gained 5 more from another, younger classroom. This was something that my class really struggled to cope with. Prior to the class change-up, room six worked hard to create a close-knit classroom.  Everyone was mates, and nobody wanted their mates to leave. At the same time, the new students were coming into an unfamiliar classroom environment - one which had a very close bond. This made the new students feel somewhat unwelcome and apprehensive to join their new classroom.


This term we have had to work hard to work hard to establish a new classroom culture, where both new and original room sixers feel included, safe and happy. This is an honest reflection of the realisations I have come to.


Here are some important things I have discovered when dealing with conflict in the classroom


Getting to the bottom of problems ASAP


As soon as I have gotten wind of a problem, I have made it my priority to deal with it straight away. Sometimes this has meant that I have had to leave the rest of the classroom whilst dealing with a small group. I think this has helped because things were not left to escalate, or become worse by others getting involved.


Two sides to every story


This is something that we all know- but do our students?  Before starting a restorative conversation, I have learnt the value of expressing this to my learners. There are two sides to every story, and there are always truths on both sides. Emphasising this fact helped my learners to understand that I was willing to listen and support both parties. As a result, situations were calmed down because both parties knew that I cared and would listen to what they had to say.


Compartmentalising problems


I noticed that often the 'big problem' between the two parties was created from many smaller, unrelated problems.  Some of these problems involved intentional unkind acts, whilst others were not.  I felt that it was really important for the students to see that while there were some instances of meanness, other times it was just misinterpreted and innocent.


As a group we work through each problem in isolation. Initially this is difficult, as students will bring up other issues when trying to deal with the one problem in particular. I needed to remind the group that we would make sure we shared and solved each problem, but it was important to focus on one at a time.


Asking why


A problem isn't solved unless you get to the root of it, and find out what caused it in the first place. Asking why helped to find out more details, understand the feelings and thoughts behind actions, and also find out how the problem began. It also helped to discover when actions were intentional or just misinterpreted. The more information you ask for, the better you understand the problem and how best to solve it.


Taking time to talk, listen and say sorry (and mean it)


It turns out that one of the biggest problems we had this week was due to a fight that happened last year.  There a physical altercation between two groups and it was broken up by the teachers.  It turns out they were still holding onto what happened a year ago, because they never actually dealt with the problem.  Instead, they were just told to apologise.  This meant that body language, meaningless comments and moods were misinterpreted as angst towards the other group.


The biggest problem with this is that they never able to move forward because there was never any restorative conversation.  Instead, their anger was just left to fester and become much worse. It can be easy to just make children apologise and expect them to move on. However I have seen the value of taking time to allow all learners to share their perspective of what happened, why and how it made them feel.  It was much easier to give a genuine apology once they understood the thoughts and feelings behind the actions. Following that comes the joint decision of how to move forward.


Understanding learners cultures and family backgrounds


This is probably the biggest thing I have learnt. Due to their cultural and family backgrounds, children deal with conflict in different ways. At home, some children are free to share their problems. Others are expected to 'suck it up' and never voice their problems. Some children are even punished for speaking their minds. It was pretty naive of me to think that all learners would be able to voice their issues with ease.  In fact, this turned out to be a huge barrier to dealing with conflict.  This had meant that small issues were left to fester, leaving all parties more upset, angry and confused.


It is really important that students know that they have permission to share what is making them angry, hurt and upset.  In saying this, it is also important to acknowledge that all families deal with problems differently, and that is okay. The last thing I would want is to come across disrespectful towards my students families and cultures. While stressing this to my learners, I also explained that at school we need to be able to talk about our problems so we can solve them together and move on.


And lastly...


Everyone always says it, but it is so crucial to know your learner.  I have found that if students feel valued and cared for, they are more likely to open up and respond better to restorative conversations. The hardest students to get to talk were the new students to room six.  Building rapport takes time to develop but I feel it can make such a difference.

Summing it up


This week has been quite the challenge. I have seen how important it is to deal with problems as soon as they arise. I also have learnt that students home lives and cultures can play a huge roll in how they deal with conflict. This can make it difficult for some learners to openly express their feelings. In saying this, it is super important that students understand that they are encouraged to share what is bothering them. At first it felt personal that my learners were unwilling to share how they were feeling.  But taking the time to the right ask questions allowed me to learn so much more about my learners.


Thursday, 6 July 2017

Mid-year reflection

Where has the time gone?! It is crazy to think that we are half-way through the school year.  With the end of term two quickly approaching, it has been a good time to reflect on how it has been going.  

I created a Google Form to gain insight into the feelings and opinions of my learners.  I stressed the importance of my students taking their time and answering the questions as honestly as possible.  I explained that the purpose of the survey was to see what was working well in room six and what I could do better. It was very important that my kids felt comfortable to be completely honest. There is always room for improvement! 


The feedback I received was really heart-warming.  When asked the question Do you like being in room 6? the students had to rate between 1 and 5 (1 being no, and 5 being yes).  It was awesome to see that the general consensus was that my students enjoyed being in the class.  This question was followed by Why do you/ do you NOT like being in room 6? I did this because I wanted to know why my students liked or didn't like being in room 6.

Here are some of their responses: 

 I like being ing room 6 because we always learn new stuff everyday.

Because it is cool and I got a cool teacher...


I like being in room 6 because I have lots of friends and I learn more


It depends on what we do.


I do like being in room 6 because miss tries to make learning fun. She makes it so that we want to learn and no one is forcing us to learn.


We learn a lot of things 


because my teachers kind and I learn lots of things


I like room 6 because Miss D makes learning fun 


because we hardly get free time


I like room 6 because we can talk about our feeling about each other. Room 6 is the best classroom ever. Give things a go. 


I like being in Rm6 because I got a awesome teacher that helps me learn and achieve my goals now and for the future. 


I am so glad that my learners feel that learning is fun in room 6.  This is something I am always trying to keep in mind when planning. At the start of the year, most of my learners were well below national standard. This had meant that I have needed to be creative in my approach to teaching the class. I had wanted my class to be engaged and to enjoy learning. I love that many of my students feel they are learning heaps in my class. 


Another firm belief I have is that in order for kids to learn, they need to feel happy and safe (because who wants to learn in a class where they are miserable and uncomfortable?). I think the responses clearly show that I have created a safe, happy and positive classroom environment. This makes me incredibly happy. It is something I have continuously worked on throughout the year.  Whenever the wheels started to fall off, we would revisit the key ideas of discipline, collaboration and kindness. We also celebrate shift and small victories. I have chosen to focus on shift rather than national standards, and as a result I have seen my students confidence and self-efficacy rise. I believe these things have made a huge impact on my students - academically, socially and emotionally.


The responses in blue are the two students who rated 3 on the first question.  The student that said it depends on what he does is one of my top students.  This makes me wonder whether he is possibly bored/not challenged enough.  I am going to have a discussion with him so I can figure out what he would like from me.


Reading, writing and maths in room 6


I wanted to discover my students attitudes towards reading, writing and maths.  I asked them a series of questions, with likert scales and open-ended questions. As you can see, the majority of my class loves maths, and feels okay about reading and writing.  


I also asked my learners what they liked, didn't like and what I could do differently for reading, writing and maths.  The responses were mostly positive.  The main negatives I got was that they hate sitting on the floor for maths, and a lot of my students don't really like writing.  With respect to writing, I think I need to be a bit more innovative.

Here is the link to the survey results.


What's working well

  • Students feel safe and happy in room 6
  • Room 6 loves learning maths
  • lots of accelerated shift in achievement - yay!
  • An increase in self-efficacy and confidence in students learning and ability
  • Students enjoy using digital tools to help them learn (blog post coming soon)


What's next?


From the feedback I have recieved from my class I have formulated a few questions which will help to refine and improve my teaching


  • How can I use digital tools to increase engagement and understanding in writing?
  • How can I help to excite my learners about reading and writing? 
  • How can I engage one of my high achievers?
  • How can I continue to accelerate my learners achievement in maths?
  • How can I make sure that my use of digital tools and lessons are deliberate and effective? 

The past two terms have been challenging but so incredibly rewarding.  It is so great to be a part of my learners growth and development.  We have come a long way from day one and I am very proud of the effort that every student has put into their learning.  I am looking forward to seeing what the next half of the year brings!

Parting words from my learners...


Finish this sentence: I want Miss D to know....


I want to do basketball sometimes when we go out for PE.

that I love being in her class

that we like spending time with Miss D

"that I want to do more fitness and I don't like writing. sorry miss"

do fitness in the morning 

i don't wanna move classes because i like it in this class

How I love this class

What I am doing

i hate writing

she is the best teacher

That she is the best teacher ever off my life.

I want Miss D to know that she is the best and funny teacher I've ever had.

I want Miss D to know that no matter what she picks for next term for the class I support her 100%.

Saturday, 24 June 2017

Getting kids hyped about blogging: an update

A few weeks ago we looked at our blog stats and our global audiences.  Since then, my learners have become more interested in sharing their learning on their blogs. I really wanted to capture and keep their enthusiasm, so I have made a display for the room. 


1000 club


My kids were really excited to see their blog views as well as the countries. I decided to encourage this attitude, as well as a little competition.  I started off with just the '1000 club' - for students who have 1000 blog views or more. Since some of my students have only just got blogs, I decided to also include a '500 club'. I want my learners to feel proud of their blog views and celebrate their global audience.  


Top bloggers


I also wanted to encourage my learners to regularly post high quality blog posts.  I decided to run a weekly competition, using a tally system.  Every time a student posts a high quality blog post, they get one point.  The top blogger of the week gets a prize.  I have enlisted the help of 3 students to check the blog posts and record the points. My helpers check that the blog post clearly explains their learning, how they went and what they can do to improve. My helpers also check that the blog posts make sense. It has also been helpful to have helpers, as it can be hard to check every blog post before it is posted.

Infographics

At the bottom of the display I have included the students infographics about their global audience.

How it's going

Even though I have just started using this blog display, my learners are already so keen to get sharing their learning. In fact, after explaining how the top bloggers competition works, something crazy happened.  The bell went for morning tea, and no one moved.  Every student stayed and completed their blog posts. And it kept happening throughout the week.  Personally, I think a little extrinsic motivation can work wonders. When students write a blog post they are summarising, evaluating and reflecting on their learning. Even if they are motivated by the idea of a prize, they are still summarising, evaluating and reflecting on their learning, which I think is awesome. 

Next steps

I am hoping that my students enthusiasm towards blogging will continue.  It is important that I continue to stress the importance of quality blog posts, where students summarise, evaluate and reflect. I would like my learners to write more detail in their blog posts that is more than "I need to try harder".   I would like my learners to be more specific as this will help them to understand their next steps in learning.


Sunday, 28 May 2017

Student blogging: getting kids hyped about their global audience

I have been thinking about ways to encourage and motivate my learners to share their learning on their blogs.  This is something that is expected in Manaiakalani, however I feel that my learners are not really interested in it.  We have learnt about what to include in a blog post as well as writing blog comments. Now I have turned my focus on helping my learners to want to share their learning on their blogs (rather than me telling them).


Click here to view the Google Drawing that was used for this lesson

The motivator

A student at another Manaiakalani school received a comment from a famous author.
Before we started looking at our blog statistics we discussed the idea of a 'global audience'.  To motivate my learners, I shared with them a blog post from an ex-student from another school.  In her blog, she wrote about a recipe that was inspired from a book she had read. The author actually found her blog post and commented on it! This was a powerful way to illustrate that sharing your learning online can be exciting and gives you a global audience. We also discussed the importance of sharing enough detail in your blog post and using labels, as this helps people to discover posts.

Looking at our stats


First, we all had a look at our statistics. I had my own blogger dashboard up on the SMART board, and asked students to figure out where they could find out how many blog views they have. I was surprised with how pleased they were with how many views they had. We discussed that the more we shared, the more views we would get, as well as reiterating the importance of quality blog posts with labels.

Next, I asked them to see if they could figure out where to find out which countries the viewers were from.  After some investigating, learners hopped onto the Audience section and were surprised with the results. The students exclaimed over the countries. Some had visitors from more than 6 different countries.

Infographic time

Now that the learners were feeling motivated and proud of their blog statistics, it was time to share it on their blog. I decided to introduce the class to creating Infographics.  When we learnt about Infographics in the MDTA, I had created one about my global audience (read about it here). I used my infographic as a model of how they could present their statistics. My learners loved the look of the infographic and were eager to begin creating their own.  We used Canva, as I have found it to be easy to use and very effective. I also like how you can upload your own images for free on Canva, which is something that you can't do on other infographic creators.


Angel's blog post

Sione's infographic


Summing it up

I was a little nervous to introduce a new way to create a DLO, however this was the perfect opportunity.  The students loved using Canva, and some grasped the concept of using less text and symbols better than others.  This is something I can continue to work on. The class was really engaged in this lesson and they loved seeing their statistics. I do think they felt pretty empowered and motivated. I am hoping this will motivate them to want to share their learning (instead of me always telling them to). Stay tuned!

I also decided to create an updated infographic about my global audience, enjoy!


Using YouTube & Google Docs to Teach Recount Writing

For writing this term, our main focus is on Recounts.  I am trying to make my lessons more engaging and meaningful for my learners.  After using YouTube for poetry & learning about acceptance, I decided to use videos as inspiration for recount writing.

We have covered the language features used in recounts and we have learnt the acronym TREE to remember the structure of a recount. So this week we have narrowed our focus to the first paragraph of a recount - the 'Reveal' paragraph.

I chose to break my teaching down like this as I have found that the majority of my class struggles with writing. My thinking is that breaking down a recount into more manageable chunks will allow them to have a deeper understanding of each section. I also choose to break up my class into two groups.   This is because I want to make sure everyone is participating in the sessions.  Oftentimes, certain learners will share and contribute while others will remain quiet.

This week we used Google Docs and YouTube to learn more about the 'Reveal' Paragraph.  To start with we discussed the key components of a reveal paragraph - a hook to grab the reader's attention and the 5ws. Then we had a go at identifying the Ws and the hook in an exemplar paragraph.

First up, a vlog!


click here go to group 1's collaborative Google Doc
Then, we turned to the interesting bit! We used Google Docs as an online form of a modelling book.  Each student had their Chromebook and editing rights.  First we had a go at writing a reveal paragraph as a class.  I chose to use a vlog about her first bungy jumping experience.  We watched the first minute and discussed what we saw. We brainstormed as many answers to the 5ws as we could.  Then, we worked together to write our paragraph. Lastly, we added our 'hook'. After sharing each other's 'hooks' we combined the best ones and added to the beginning of our paragraph.

click here go to group 2's collaborative Google Doc

The Present: pair paragraphs


Next the students worked in pairs to write another 'Reveal' paragraph. I chose to use The Present. I felt that the students would find it easier to write about The Present because we have already used The Present to learn about acceptance (& more). Since we were only focussing on a 'Reveal' paragraph, we only used the first 30 seconds. Again, the pairs brainstormed 5ws and then began writing their paragraphs. I decided to get my students to choose the Ws that they felt was important with setting the scene.  I have found that sometimes recounts can get a little boring, as there is too much focus on addressing all the Ws (ie On the 21st of June on a cold afternoon, I was playing PlayStation... boring!). Instead, we chose fewer Ws and also elaborated on some of  ideas.


Going it alone


Lastly, students had a go at writing their own Reveal paragraphs. I was able to get up to this with G1 but am planning on finishing this lesson with G2 next week.  I was pleased with the quality of the paragraphs.  Students were also adding in interesting hooks, which helped to grab the reader's attention.


Pair/individual follow up task


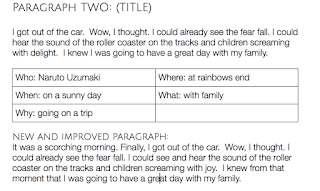
The follow up task was Revealing Paragraphs. This involved a number of steps.  First, students had to unpack a reveal paragraph by identifying the Ws. Next, they added in an interesting title.  Lastly they found ways to improve the paragraphs by making them more interesting by adding in a hook and some extra description.


Summing it up

Overall I am pleased with how this went.  Both groups were able to create some interesting reveal paragraphs.  I think using YouTube really helped, especially with my lower writers. It was also important that the students planned out the Ws before writing their paragraphs.

Using Google Docs was useful as all students could collaborate on the same document during our guided writing session.  I had the Doc projected up on the SMART board, so was able to discuss the paragraphs as well as address any errors. It will also be something that we will be able to return to, unlike writing on whiteboards that will disappear after the lesson.

I did notice that my class struggles with correctly using dialogue.  I will work on this next week before I continue onto teaching the 'Events' section of a recount.

Wherever possible, I will definitely be using Google Docs as a form of modelling books as well as using YouTube to help students in writing.


Thursday, 16 March 2017

Creating Our Own Quizzes!

My learners love of Nearpod

I have been using Nearpod as a way of engaging my learners and building on their knowledge of stormwater pollution. They absolutely love it.  Whenever we use Nearpod the students are so much more engaged and eager to participate in the learning.  We have done a lot of learning so far about stormwater pollution and our local river - Omaru River.  I wanted to come up with an exciting way for my learners to show me what they have learnt so far.   


Since they love taking part in quiz-type presentations like Nearpod, I decided that they could create their own quizzes to show me what they have learnt.

My learners loved this idea and immediately began creating their own tasks.  Since Nearpod is actually created for educators, I gave students two platforms to choose from:Kahoot! and Socrative.  All students ended up choosing Kahoot! because it is very user friendly.


Creating Quizzes

It was interesting to see the types of questions and answers my learners were creating.  I think creating a quiz added an extra element of difficulty. Not only did they have to come up with a question and an answer, but also other plausible but incorrect answers too. My learners seemed to enjoy the challenge though!  When some students became stuck I modelled a couple of example questions on the board.  This helped to make a connection between what they had learnt and how they could use it in a question/answer form for the quiz.


Quiz time

After looking through the quizzes, I am pretty pleased with how they turned out.  They show that my learners have actually learnt a lot about stormwater pollution and our river.  The next part of the activity is to have a go at eachothers quizzes.  Stay tuned to see how the learners respond to having a go at eachothers quizzes!

Monday, 6 March 2017

Digital Tools my Learners are Loving

I can't quite believe I am almost half-way through my first term of teaching in my own classroom!  It feels like time has flown by, but it also feels like yesterday that I met my classroom for the first time.  However, the students have grown to be a lot more confident using digital tools - which is very different to how they came into my classroom.

I was super excited to begin teaching my learners in a way they hadn't learnt before.  Luckily, my learners really took to using digital tools - so much so, that they get pretty thrown when we do anything on paper.

Here are my top three tools/sites that my learners are loving.

Nearpod

I've wrote about it before, and I am still a massive fan of Nearpod.  My learners absolutely love using it.  They go from reluctant, shy learners to confident collaborators.  So far I have used Nearpod to gauge students Prior Knowledge of explanations, as well as inquiry lessons about stormwater pollution and the health of rivers.  I have been using a range of its features, such as polls, quizzes, open-ended questions and collaborate (like Padlet and LinoIt).  What is so great about Nearpod is that you can add as many slides and activities as you want.  I often have slide with an image to start conversation, followed by a poll or quiz, and then an open-ended question or collaborate. Another cool feature that my learners love is the ability to 'like' posts on collaborative activities.


One day I discovered I accidentally erased the student's contributions to a Nearpod.  Instead, I got my learners to participate in a quick bus stop rotation, where they had to share their ideas about a photograph to do with stormwater pollution and rivers.  The content of the lesson was basically the same as what would have been done with Nearpod.  However, the students level of engagement was completely different.  It was interesting that as soon as we got back to using digital tools (Mentimeter this time) the students perked up and were engaged once again.  This shows the power that tools like Nearpod and Mentimeter have on my learners. They are are highly engaging and my learners love them!

Answergarden

This was suggested by Ashley during Summer School and I wrote about it in a previous blog post. 5 weeks down and my learners are still loving Answergarden.  I have used Answergarden when creating a class contract, getting prior knowledge, during writing lessons and 40 character summaries in inquiry.


I think this tool works for a number of reasons.  Firstly, it encourages students to summarise and be succinct.  It is a great way to see the ideas that are common amongst a group or class.  Learner's also find it much easier to share their ideas on Answergarden instead of verbally.  While it's easier for them to share, learners are still sharing their ideas with their peers before they post, so they still are sharing their ideas verbally.


Prodigy

I discovered Prodigy from a Facebook post on the NZ Teachers (Primary) page. It is a maths site where students are wizards and battle pets and other characters. In order to attack, students must correctly answer a maths question.  Teachers can assign certain topics and decide how long the topic will run for.  You also can track your students achievements and the topics that they are struggling with.


Assign topics or strands for your students to work on

Check students achievements and gaps


I was so surprised with how much my learners loved using this site - so much so, that they were using it during their 'free time' at Tech (at Tamaki College).  One afternoon, with a change of plans I suddenly had the last block free.  I decided to let the students pick between finishing three tasks - Hour of Code, an all about me activity or Prodigy.  All but two students choose to go on Prodigy. Further, learners stayed on the site the whole block! No cheeky changes of tabs or going on other sites.

Summing it up


I use Nearpod as a way to expand on my students ideas.  It serves as a conversation starter and allows for my learners to confidently share their ideas. They love seeing the poll and quiz results, as well as watching their ideas on collaborate get 'likes'.

Answergarden is an awesome way to identify common thoughts/ideas around a topic.  It is also a useful tool to help learners to summarise and be succinct.

Prodigy has added some extra excitement to my mathematics rotation. The 'game-like' features have hooked my learners in.  The 'Reporting' section helps me to see where gaps are in my learners knowledge.


All in all, I'm really enjoying using digital tools to help engage learners and encourage collaboration. I will definitely continue to hunt for new and exciting tools to try in my classroom.

Sunday, 5 February 2017

Creating a Collaborative Classroom: Team Building

This week I have focussed on creating a safe, inclusive and happy classroom environment.  One of my favourite tasks so far would have to be the one we completed on Friday.

Can You Draw It?

I'm not sure of this games exact name, but it is a variation of this team building exercise, found on Pinterest. This is what you need:
  • Groups of four - five is ok too, if one student is the instructor.
  • A felt tip pen with two strings tied to it, creating four pieces of string.
  • A2 or A3 paper for each group
  • A print out of a simple drawing
All you need: A felt-tip pen with two strings tied, a simple drawing and some A2 newsprint paper

Instructions

  1.  Each group member holds a piece of string.  They each have a piece of A2 paper and a print out of a simple drawing.
  2. The group has to work together to replicate the simple drawing.
  3. Students must be holding onto the string, they cannot touch the pen.
The group with the best drawing wins!


This activity was lots of fun and pretty hilarious.  There was laughter and a bit of frustration, as teams worked together to draw the image.


Although this activity was meant to be fun, there were some more serious lessons which underpinned the students success.  The students had to work together. Everyone had to help out and take part.  If one group member decided not to try, then the pen would not stay upright and the team would struggle.


Moral of the lesson


Everyone must work together, if one person doesn't then it won't work.  This is the case for collaborative work.  It is crucial that everybody pitches in and helps out. In order to succeed, everyone needs to play a role and contribute to the group.

Once students had calmed down from the excitement, we had a discussion about what the point of this task was.  I was happy that they could relay that it was about the importance teamwork and everyone doing their bit.


Next week...

Next week I am planning to continue setting team building challenges for my classroom.  This is helping my learners to feel safe and confident in my classroom.  It is also building a collaborative environment - which is what my learners asked for. I am looking forward to watching my learners progress from shy to confident classmates.


Saturday, 4 February 2017

Creating a Collaborative Classroom: Day One & Two

It is always hard starting the new year with a new teacher and new classmates.  So this week I have focussed on creating a collaborative and inclusive classroom environment.  Whilst it started off a little slowly (with technical road bumps and very shy students), I am starting to see and hear collaboration happening in my classroom - and only on day two!

Key Competencies - TRUMP

My first day was focussed on learning more about the Key Competencies.  The NZ Curriculum says it is important, and our learners are even graded on the KC's in their report.  Despite this, students generally do not know what they are and what they mean.  Today we focussed on unpacking each of the Key Competencies: Thinking, Relating to Others, Using Language, Symbols and Text, Managing Self and Participating and Contributing.


Finding out their PK

To start with, I wanted to get the students Prior Knowledge, so they participated in a quick bus stop rotation.  This was when they shared what they thought each word meant.  This was supposed to be done on Google Docs, but we had no internet at the time.  It was great to see that my learners already knew quite a lot!


Students PK from the Bus Stop rotation

Unpacking as a Class

After this, we unpacked each one as a class. We drew on their ideas from the bus stop activity, and think-pair-shared our ideas of what each KC meant.  After this, we discussed how we could show each KC.  I helped them think about this by asking them "If the Principal walked into our classroom, what would he see if you were ___".  Asking what people would see helped my learners to understand what each KC means and 'looks like'.  To start with my learners were hesitant to share, but after lots of encouragement and positivity, there was a lot more talking happening amongst the table groups.


Time to get Creative!
Student's photographs of them showing the Key Competencies

After sharing our ideas and recording them on the board (there was no internet, so no LinoIt! 😞 ), my learners were given the challenge of taking photographs of them showing each of the 5 KC's.  They seemed to enjoy this part.  The boys and girls worked together to take photographs.  They were sharing their ideas and starting to relax with each other. 


I created a wall display which used their definitions and ideas, as well as their photographs. This will serve as a visual reminder of the ways my learners are expected to behave. Because it is their ideas and their photographs on the wall, there is more accountability for them to stick to rules and show the KCs.
Our wall display with the students own definitions, ideas and photographs

Class Contract

The next day we created our class contract.  I started the lesson off by revisiting the KC's and asking why it is important to know and use them.  For the class contract, I decided to use AnswerGarden. The question on the first AnswerGarden was "What helps you learn?".  AnswerGarden was a great tool to use because the ideas that were repeated would grow bigger.  This was a great way to see at a glance what was important to my classroom.  Learners also collaborated on an AnswerGarden asking "What DOESN'T help you learn?".  Both questions were incredibly insightful and gave us lots of things to draw on for our discussion. 


AnswerGarden for "What helps you learn?" click here access the AnswerGarden

AnswerGarden for "What DOESN'T help you learn?" click here access the AnswerGarden


AnswerGarden was a great tool to use to get students to share their ideas.  It was an easy way to see what was important to my learners.  I also think that it helped the students to share their ideas because their names were not attached to the ideas they posted.  It was also reassuring for them to notice that many others had said the same thing (when their ideas grew bigger, or from noticing someone had said something similar).  I would definitely use this tool again with my classroom.

Class Discussion

Following the AnswerGarden, the class choose the most important words/phrases relating to what helps them learn or not learn.  Using Think Pair Share, we discussed the importance of each of the ideas as a class.  I choose to keep relating their rules back to the idea of us wanting to create a safe, inclusive and happy environment.  Next, I got the students to form small groups and write 6 rules for the classroom.  


Lastly, we shared our rules, mixed them together and adapted them to create a set of rules that we were all happy with. It was great to see my students gaining more confidence, with some of my shyest students sharing their rules.

Wall Display of Class Contract

I created the class contract on Canva. In hindsight, I could have gotten the learners to help choose the template, colours and fonts (this would have given them more ownership of their contract).  


Instead of getting the students signatures or hand prints, I chose to use puzzle pieces.  Before getting the students to make their puzzle piece, we discussed the importance of the contract and adding their puzzle piece.

Where to next...

Overall I am pretty pleased with how the first two days have gone.  I will need to keep going over/referring to our class contract and our KC wall to reinforce our class expectations.  Despite their shyness, the majority of students (17/19) said they preferred working with others in groups.  So I need to continue to encourage learners to work together and share their ideas. One thing I noticed was the reluctance to work with the opposite gender.  This is something I need to keep in mind.  I will continue to encourage my learners to collaborate and celebrate when they do so.  They have already showed me that they can do so much more when they work together. I was also really happy with the way they have grasped using digital tools like AnswerGarden. I need to continue to find new and engaging tools that will allow my learners to feel confident to share their ideas with one another.