Showing posts with label Engagement. Show all posts

Friday, 7 July 2017

What my kids think about using digital tools

As term two draws to a close, it has been a great opportunity to gather feedback from my students. Along with my surveys about my teaching, I also wanted to find out my classes perspective on using digital tools.  This has been a massive change compared to how they had learnt in their previous classrooms.  I use digital tools on a daily basis, and not just Google Apps for Education (such as Docs, Drawing, Slides).  While I love teaching using digital tools, I wanted to know what my kids actually thought about it.

Digital tools vs. traditional Think-Pair-Share


I have spoken previously about the affordances of digital tools, compared to the traditional and verbal Think-Pair-Share approach. I have always believed that they increase engagement and participation, as they help students to feel comfortable and willing to share their ideas.  I also believe the quality of responses is higher. My own opinion on digital tools vs traditional T-P-S proved to be the same as my learners.  I posed the question: Do you prefer sharing ideas verbally, or with digital tools? Out of the 16 students who took part in the survey, 15 said they preferred digital tools, while one student said he liked both.

Here is what they had to say about why they prefer digital tools:

Because it is better

Because it's easy to use and it's really fun

because it  is faster and because half of the class don't even share there ideas verbally.

Because we can share our ideas and  I like the word clouds.

Because I can see everyone answer.

because I don't like writing on paper

because it easy and a little bit fast.

Sometimes I like doing it on both.

Because it helps us with our learning 

I like Nearpod because it helps us answer questions on what we learn and you get to write as many words as you can.

because it's good for us to learn 

I like nearpod because it shows your Ideas on the screen.

I like using it because we share our ideas with the whole class.

I like mentimeter because It has lots of things and its fun.

Because you can write more sentences.


Creating DLOs


As Glen Innes School is a part of the Manaiakalani cluster, our pedagogy is Learn, Create, Share.  I wanted to focus on the 'create' aspect, and discover how my students really felt about it. After students have learnt something, they use any app they like to create a 'Digital Learning Object' (DLO).

Essentially, a DLO is something that is created by the student to show their understanding.  A way that it is explained to students is that it can be used to teach somebody else.  Therefore, a DLO needs to be clear and easy to understand.

Again, I used a likert scale to find out whether they liked creating DLOs for reading, writing and maths. I wasn't surprised with the responses I received:

Overall, students enjoy creating DLOs to show their learning


It is pretty clear that my learners love to create DLOs about maths.  My class was relatively new to the concept of creating a DLO, so I initially focussed on creating DLOs in maths.  Now that they are experienced with creating DLOs for maths, my class absolutely loves it.  They are always engaged, and their DLOs are becoming more detailed and articulate.

While the response towards creating DLOs for writing and reading is still mostly positive, there are students who either don't like it, or feel impartial.  In an effort to boost their enthusiasm, I am working on introducing new tools for learners to use. I wonder whether their lack of exposure to creating DLOs in reading and writing has contributed to some of the students not enjoying it.  I am hoping that over time the students will enjoy creating DLOs in reading and writing as much as they do in maths. 


Students perspective on using digital tools

I used likert scales to determine how students felt about the commonly used digital tools in our classroom. Here are the results:


Class favourites

The most common favourite digital app was Kahoot, followed by Google Apps (Docs, Drawings and Slides) and Canva.  Some students chose more than one favourite, which is why there is more than 16 responses. To help make sure these really are my students favourites, next time I would list all the digital tools we have used to help learners pick a favourite. There is a possibility that the students choose these apps because they were spoken about and used in the last two weeks. 


Here is what they had to say about their favourite apps and why...

Read theory because when you are done read you can answer the questions 

google doc,google drawing,and more

Collaborative Problem solving

Cause it's fun playing on kahot! and plus learning from you  mistake.

kahoot because it cool

Kahoot, quizizz and canva

Quizzes because you don't have to wait for the teacher to press Next like on Kahoot. 

Canva because you can create your own posters 

I like kahoot because it's fun and it is also helpful

I like using them for work because they're easy to use.

I like DLO because it helps us what we did for maths.

Kahoot because we want to win so it motivates us to read the question carefully and be fast to answer it. Nearpod because I think it helps me understand that it doesn't matter if I get a question wrong, because I'm not the only one who got it wrong. Canva because I get to be creative and make inforgraphics.

youtube and because you can play music and a movie

I like mentimeter because its fun 

Kahoot because you can play games and learning games.

Notes:

  • When students mentioned DLOs I counted this as GAFE because they mostly use Google Drawings and Slides to show their learning.
  • I have copied and pasted the responses exactly how they were written - hence the typos and grammar issues.

Least favourites


Here are my students responses to their least favourite digital tools:

ANSWERGARDEN because it doesn't let us write lots 

Nothing

nothing I like all the digital apps that we use.

Nothing

Socrative because it dose not have funny meme's like quizizz.

Kahoot because you have to wait for the teacher to press Next.

Answer garden because you can only use 40 letters or 20

Mentimeter because I don't like how it is created. 

none because I like them all.

I don't have one.

none

play store because you can download games 

Answer garden all you got to do is write the answer for the question and the words get bigger  

Answergarden because you can only write like 40-60 letters


While the majority of students said they don't have a least favourite digital tool, the next most common response was AnswerGarden.  I think this is interesting because their reasons is one of the reasons why I personally like AnswerGarden.  Because of the word limit, AnswerGarden forces respondents to be succinct.  This can be a challenge for students.

Summing it up


It is great to see that the response to digital tools is mostly positive.  Digital tools help to increase student engagement, as they are more willing to share ideas and collaborate on tasks. My survey has also shown that the class prefers using digital tools over traditional verbal methods of sharing and collaboration.  I will continue to expose my learners to new and exciting digital tools, as I think this will help them to become more comfortable with using them.

Monday, 1 May 2017

Life Lessons with Short Films & Nearpod

Last term I did an awesome lesson which used two of my favourite apps - Youtube and Nearpod.  As the term was coming to an end, I felt that my students needed to be reminded of the importance of acceptance, kindness, non-judgement and tolerance.  I was talking to one of my workmates, not sure of what to do on a Friday. She said that she often used YouTube as a starting point for writing.  She uses CGI short film animations.  This got me thinking about how I could use film to help teach some concepts that I felt my learners were forgetting.  Then I remembered The Present.

The Clip


The Present is a very powerful clip that my kids loved! We watched it twice before beginning our Nearpod. I chose to let it run through without stopping or asking questions because I wanted them to take in the film as a whole.

Retelling

My first activity on Nearpod was using 'Collaborate' where students had to retell the most important bits of the film.  I was impressed by the level of engagement.  As always, I use their ideas as a starting point for further discussion/elaboration.


Inferring

The next activity was an 'Open Ended Question'. This was an inference question, which asked students to think about why the mum wanted to give his son a present. The next activity was a 'Collaborate' asking Why did the boy get so angry when he noticed what was wrong with the dog? The students were able to come up with some insightful ideas for both questions.


Evaluating


Next, students shared their opinions on the boys reaction to dog, and whether it was right or wrong.


Author's Purpose

Lastly, students shared their ideas about what the message was that the author/creator was trying to tell their audience.


Creating a DLO

After all the discussion that was drawn from the Nearpod activity, my learners created DLOs to share their learning.  I let them create anything they wanted. They created Comics, Google Drawings, wrote poems, recounts and wrote explanation pieces.


Summing it up


Overall I was pretty pleased with how this lesson went.  My learners were really engaged and it created a great opportunity to discuss being grateful, kind and non-judgemental. They loved the film and Nearpod helped them to feel eager to share their ideas with the class.  Creating a DLO was a great way for me to see what they took away from the lesson. It was cool to see the broad range of DLOs created. 

Monday, 6 March 2017

Digital Tools my Learners are Loving

I can't quite believe I am almost half-way through my first term of teaching in my own classroom!  It feels like time has flown by, but it also feels like yesterday that I met my classroom for the first time.  However, the students have grown to be a lot more confident using digital tools - which is very different to how they came into my classroom.

I was super excited to begin teaching my learners in a way they hadn't learnt before.  Luckily, my learners really took to using digital tools - so much so, that they get pretty thrown when we do anything on paper.

Here are my top three tools/sites that my learners are loving.

Nearpod

I've wrote about it before, and I am still a massive fan of Nearpod.  My learners absolutely love using it.  They go from reluctant, shy learners to confident collaborators.  So far I have used Nearpod to gauge students Prior Knowledge of explanations, as well as inquiry lessons about stormwater pollution and the health of rivers.  I have been using a range of its features, such as polls, quizzes, open-ended questions and collaborate (like Padlet and LinoIt).  What is so great about Nearpod is that you can add as many slides and activities as you want.  I often have slide with an image to start conversation, followed by a poll or quiz, and then an open-ended question or collaborate. Another cool feature that my learners love is the ability to 'like' posts on collaborative activities.


One day I discovered I accidentally erased the student's contributions to a Nearpod.  Instead, I got my learners to participate in a quick bus stop rotation, where they had to share their ideas about a photograph to do with stormwater pollution and rivers.  The content of the lesson was basically the same as what would have been done with Nearpod.  However, the students level of engagement was completely different.  It was interesting that as soon as we got back to using digital tools (Mentimeter this time) the students perked up and were engaged once again.  This shows the power that tools like Nearpod and Mentimeter have on my learners. They are are highly engaging and my learners love them!

Answergarden

This was suggested by Ashley during Summer School and I wrote about it in a previous blog post. 5 weeks down and my learners are still loving Answergarden.  I have used Answergarden when creating a class contract, getting prior knowledge, during writing lessons and 40 character summaries in inquiry.


I think this tool works for a number of reasons.  Firstly, it encourages students to summarise and be succinct.  It is a great way to see the ideas that are common amongst a group or class.  Learner's also find it much easier to share their ideas on Answergarden instead of verbally.  While it's easier for them to share, learners are still sharing their ideas with their peers before they post, so they still are sharing their ideas verbally.


Prodigy

I discovered Prodigy from a Facebook post on the NZ Teachers (Primary) page. It is a maths site where students are wizards and battle pets and other characters. In order to attack, students must correctly answer a maths question.  Teachers can assign certain topics and decide how long the topic will run for.  You also can track your students achievements and the topics that they are struggling with.


Assign topics or strands for your students to work on

Check students achievements and gaps


I was so surprised with how much my learners loved using this site - so much so, that they were using it during their 'free time' at Tech (at Tamaki College).  One afternoon, with a change of plans I suddenly had the last block free.  I decided to let the students pick between finishing three tasks - Hour of Code, an all about me activity or Prodigy.  All but two students choose to go on Prodigy. Further, learners stayed on the site the whole block! No cheeky changes of tabs or going on other sites.

Summing it up


I use Nearpod as a way to expand on my students ideas.  It serves as a conversation starter and allows for my learners to confidently share their ideas. They love seeing the poll and quiz results, as well as watching their ideas on collaborate get 'likes'.

Answergarden is an awesome way to identify common thoughts/ideas around a topic.  It is also a useful tool to help learners to summarise and be succinct.

Prodigy has added some extra excitement to my mathematics rotation. The 'game-like' features have hooked my learners in.  The 'Reporting' section helps me to see where gaps are in my learners knowledge.


All in all, I'm really enjoying using digital tools to help engage learners and encourage collaboration. I will definitely continue to hunt for new and exciting tools to try in my classroom.

Thursday, 9 February 2017

I Found a New Digital Tool & it is AWESOME!

So a few weeks ago I wrote a blog post about some digital tools that I'd newly discovered and was keen to use in my classroom.  One of those mentioned was Mentimeter.  It sounded great and I was so excited to use it.  I signed up and began creating my first interactive presentation.  I created two activities, and then it told me I needed to pay a subscription in order to add more.  Needless to say I was super gutted... and seriously considering paying. Instead, I did a quick Google search for similar digital tools.  I couldn't really find anything.

I randomly stumbled upon a digital tool when reading Jennifer Gonzalez's blog post about digital tools to use this year.  And I am so glad I did because I discovered Nearpod! It was Jennifer's number one pick, and I can see why!

Why Nearpod is so Great


As far as I can tell, Nearpod is basically free.  You can pay a subscription if you want even more features (collaborate, fill in the blanks and memory test), but the free version lets you create 'live lessons', using quizzes, open-ended questions, and polls.  Also, unlike Mentimeter, you can add in heaps of activities on one presentation.

It's really easy to use.  You create a new presentation and choose between creating a slide with content, web content of an activity.


The 'live version' of Nearpod is the free one, and it is the best option.  This is one that the teacher uses during a teaching session.  The difference between the live and student paced lesson is that the teacher controls the live version.

My Nearpod presentation

I created a Nearpod presentation to introduce my learners to explanation texts. The purpose was to discover whether my learners could identify an explanation text, and if they could explain why/why not a text was an explanation.

In my presentation was:

  • A slide with a screenshot of a text type 
  • A quiz, asking "Is this an explanation?"
  • An open ended question, asking "Why is this/is this NOT an explanation?"
So for every text type, there were three slides.  I had about 6 different text types (each with the screenshot, quiz and open-ended question).

Because I wanted my learners to collaborate, they were put in groups of 3 or 4. This meant that they could share their ideas before deciding on their answers.

How it went

I was surprised with how enthusiastic my learners were during this lesson! I knew it would help them to be engaged, but they were also super excited by the task.   Even my most reluctant learners were super engaged and wanted to see whether they got the quiz questions correct. They liked that they could see what each other got, and there were no 

Teacher's screen for quiz
Students' screen for the quiz

Teacher's screen for open-ended question

Students' screen for open-ended question


I realised that if the teacher's display was always on, then the students would see who got the right answers.  This could be a problem, as some students could wait to see what the other groups said and then choose the correct answer.  To avoid this, when it was the quiz time, I changed my tab to a student's screen.


Final thoughts

I think Nearpod might be my new favourite digital tool.  The level of engagement and enthusiasm it brought to my lesson was unlike any other tool I have used.  It was a great way to see what my learners already knew about explanations and to begin to form some ideas about the structure, content and features of explanation writing.  The students were motivated to take part, which was a massive win, as I have some reluctant learners.  I could also tell that they felt proud and very pleased with themselves, when they saw that they got a correct answer.

I will definitely be using this tool again. Students could even create their own presentations to show what they have learnt.


Saturday, 4 February 2017

Creating a Collaborative Classroom: Day One & Two

It is always hard starting the new year with a new teacher and new classmates.  So this week I have focussed on creating a collaborative and inclusive classroom environment.  Whilst it started off a little slowly (with technical road bumps and very shy students), I am starting to see and hear collaboration happening in my classroom - and only on day two!

Key Competencies - TRUMP

My first day was focussed on learning more about the Key Competencies.  The NZ Curriculum says it is important, and our learners are even graded on the KC's in their report.  Despite this, students generally do not know what they are and what they mean.  Today we focussed on unpacking each of the Key Competencies: Thinking, Relating to Others, Using Language, Symbols and Text, Managing Self and Participating and Contributing.


Finding out their PK

To start with, I wanted to get the students Prior Knowledge, so they participated in a quick bus stop rotation.  This was when they shared what they thought each word meant.  This was supposed to be done on Google Docs, but we had no internet at the time.  It was great to see that my learners already knew quite a lot!


Students PK from the Bus Stop rotation

Unpacking as a Class

After this, we unpacked each one as a class. We drew on their ideas from the bus stop activity, and think-pair-shared our ideas of what each KC meant.  After this, we discussed how we could show each KC.  I helped them think about this by asking them "If the Principal walked into our classroom, what would he see if you were ___".  Asking what people would see helped my learners to understand what each KC means and 'looks like'.  To start with my learners were hesitant to share, but after lots of encouragement and positivity, there was a lot more talking happening amongst the table groups.


Time to get Creative!
Student's photographs of them showing the Key Competencies

After sharing our ideas and recording them on the board (there was no internet, so no LinoIt! 😞 ), my learners were given the challenge of taking photographs of them showing each of the 5 KC's.  They seemed to enjoy this part.  The boys and girls worked together to take photographs.  They were sharing their ideas and starting to relax with each other. 


I created a wall display which used their definitions and ideas, as well as their photographs. This will serve as a visual reminder of the ways my learners are expected to behave. Because it is their ideas and their photographs on the wall, there is more accountability for them to stick to rules and show the KCs.
Our wall display with the students own definitions, ideas and photographs

Class Contract

The next day we created our class contract.  I started the lesson off by revisiting the KC's and asking why it is important to know and use them.  For the class contract, I decided to use AnswerGarden. The question on the first AnswerGarden was "What helps you learn?".  AnswerGarden was a great tool to use because the ideas that were repeated would grow bigger.  This was a great way to see at a glance what was important to my classroom.  Learners also collaborated on an AnswerGarden asking "What DOESN'T help you learn?".  Both questions were incredibly insightful and gave us lots of things to draw on for our discussion. 


AnswerGarden for "What helps you learn?" click here access the AnswerGarden

AnswerGarden for "What DOESN'T help you learn?" click here access the AnswerGarden


AnswerGarden was a great tool to use to get students to share their ideas.  It was an easy way to see what was important to my learners.  I also think that it helped the students to share their ideas because their names were not attached to the ideas they posted.  It was also reassuring for them to notice that many others had said the same thing (when their ideas grew bigger, or from noticing someone had said something similar).  I would definitely use this tool again with my classroom.

Class Discussion

Following the AnswerGarden, the class choose the most important words/phrases relating to what helps them learn or not learn.  Using Think Pair Share, we discussed the importance of each of the ideas as a class.  I choose to keep relating their rules back to the idea of us wanting to create a safe, inclusive and happy environment.  Next, I got the students to form small groups and write 6 rules for the classroom.  


Lastly, we shared our rules, mixed them together and adapted them to create a set of rules that we were all happy with. It was great to see my students gaining more confidence, with some of my shyest students sharing their rules.

Wall Display of Class Contract

I created the class contract on Canva. In hindsight, I could have gotten the learners to help choose the template, colours and fonts (this would have given them more ownership of their contract).  


Instead of getting the students signatures or hand prints, I chose to use puzzle pieces.  Before getting the students to make their puzzle piece, we discussed the importance of the contract and adding their puzzle piece.

Where to next...

Overall I am pretty pleased with how the first two days have gone.  I will need to keep going over/referring to our class contract and our KC wall to reinforce our class expectations.  Despite their shyness, the majority of students (17/19) said they preferred working with others in groups.  So I need to continue to encourage learners to work together and share their ideas. One thing I noticed was the reluctance to work with the opposite gender.  This is something I need to keep in mind.  I will continue to encourage my learners to collaborate and celebrate when they do so.  They have already showed me that they can do so much more when they work together. I was also really happy with the way they have grasped using digital tools like AnswerGarden. I need to continue to find new and engaging tools that will allow my learners to feel confident to share their ideas with one another.  


Friday, 25 November 2016

Reflecting on my First Year as a Beginning Teacher in the MDTA

It is crazy to think that I have almost completed my first year as a beginning teacher in the MDTA.  I have learnt heaps and grown a lot.  Here is my doco where I talk about my beliefs, the MDTA programme and how I use Manaiakalani's 'Learn Create Share' pedagogy. Thanks to Dorothy Burt, Anne Sinclair, Fiona Grant, the MDTA BTs and the team at Glen Innes Primary who have helped me on my journey!  I am looking forward putting my learning into practice into my own class next year.

Tuesday, 25 October 2016

Is your default the way you learn OR the way your learners learn?

Today we joined up with other Manaiakalani teachers for our Digital Immersion session.  The focus for this term is all about visible learning and its benefits for our students. Learners in our communities come to school below the expected standard for New Zealand students.  In order to get our learners up to standard by year 8, they need to make a 1.5 year accelerated shift. Visible learning enables such an accelerated shift.  


Each learner is different


We started the day with the question: how do your learners learn?  We chose three students and wrote down the ways in which they preferred to learn.  The answers were then collated and turned into a word cloud.  The results were interesting:


As you can see from the Tagul, there is a wide range of learning preferences.  Our learners learn differently.  This is important to remember when creating learning experiences. As teachers we need to make sure we are considering the learning preferences of all our learners, not just one in particular.   Following this, we watched a thought provoking clip of Chrissie Butler discussing UDL - Universal Design for Learning. Two key ideas resonated with me:

  • What engages one learners doesn't necessarily engage another learner
  • Is your default the way you learn or the way your learners learn?
So how can we ensure our students learning preferences are catered to in our lessons? Can we cater to  20+ students learning needs in one lesson? 

...Enter multi-modal learning!


Multi-modal learning is an approach which uses a range of modes to develop students understanding of a topic or an idea.  It is related to Gardener's theory of 'Multiple Intelligences'. The site uses a range of audio, visual and textual (paragraphs, bullet points and sentences) resources.  Students can synthesise their learning across multiple types of media to gain a better understanding.


As the MDTA already learnt about this earlier in the year (here and here), we were set with the challenge of extending our learners further.  We were set the task of encouraging our learners to select their own texts to help make sense of what they are learning.  


As my classroom has already had experience with using a range of multi-modal sites, I decided to challenge my students with a trickier topic and include self-selected texts.  Our inquiry topic for the term is weather, so I created my site to help my students learn about lightning and thunder.  I chose a range of texts (paragraphs, bullet points and sentences), videos and images (including GIFS).  As the science behind lightning is quite tricky, the texts range in reading difficulty.   I want my learners to engage with more challenging texts, so it is my hope that they will first use whichever mode they prefer to learn in, and then use the more challenging texts to deepen their understanding.


Click on the image to have a look at the site that I have created using HTML.  We have begun using this site today and will continue to use it throughout the week.


Friday, 2 September 2016

Filming for Manaiakalani Film Festival

Today we got to spend the whole day in our schools filming for our Manaiakalani Film Festival movie.

In room 8, we are creating a movie based on our learning about the Olympic values.  The three olympic values are respect, friendship and excellence. We chose to create our film on excellence.

Leading up to our filming day the class collaboratively planned our movie. This was important as I wanted my learners to have ownership of the film.  We watched some inspirational movies to help us get started.  Then we worked on a Google Doc to record what we liked and disliked from the examples.  Then we brainstormed ways we could show excellence in our film.


Then came the filming.  Thank goodness the sun decided to come out! It was great to see a lot of my learners stepping up and taking charge of the day.  I had a great director/producer who helped guide the actors.  I am very proud of my learners and what they have achieved so far.  They came up with some great ways to show excellence and were very creative with their shots.


We still have a bit more filming to do but I am pleased with what we were able to accomplish in one day.  Stay tuned to find out more

Monday, 29 August 2016

My Takeaways from Manaiakalani's Annual Hui

On Friday the MDTA were very lucky to attend Manaiakalani's 5th annual Hui - a place where teachers and learners across Manaiakalani celebrate and share their accomplishments.  

This has ended up being a rather lengthy post, as I gained many new insights from the teachers, researchers and learners at the hui.

In the morning

First up we heard our Manaiakalani student ambassadors share their learning.  It was really interesting to hear from students how they learnt in their school.  What I like about Manaiakalani is that every school is different.  Although we are all following Manaiakalani's 'Learn, Create, Share' pedagogy, each school is able to put their own spin on it to reflect the community they are in.  There were plenty of ideas that I will borrow and repurpose in my classroom, like the use of a 'Goal Wall' to make goals visible to learners.  


Following this, the Manaiakalani Innovative Teacher's shared their inquiries with the insights they gained along the way. I came away feeling inspired to give my own teaching programme a shake up to ensure my lessons are engaging, motivating and using digital technologies as much as possible.  Whilst I do believe I use technology a lot in the classroom, these teachers had come up with ideas that I had not thought of before.  Check out my infographic to see my main takeaways from the MIT.


Next up


After morning tea we heard from Rachel Williams about her holiday intervention programmes 'Summer Learning Journey' and 'Winter Learning Journey'.  Rachel's aim is to help lesson the 'summer drop off', where learners achievement declines between T4 and T1 after the school holidays. Her results show that students who participated in the 'Summer Learning Journey' had less of a drop compared to students who did not participate in the intervention.  Rachel's data was very compelling and I am excited to encourage my learners to participate in 'Summer Learning Journey 2.0'.


Next Woolf Fisher researchers, Rebecca Jesson, Stuart McNaughton and Aaron Wilson shared their insights gathered from observing teachers, and challenged us to consider what we are doing to accelerate our learners achievement.


Lastly


Dorothy, Russell and Pat Snedden spoke about where we are now and where to next for Manaiakalani.  Although we are doing a great job accelerating our student's achievement, we need to continue to reflect, refine and improve our teaching. We have a series of outreach clusters which are looking at us and using what we are doing to accelerate their learners achievement too.  Therefore, we need to be at the forefront of change and be constantly seeking ways to help our learners achieve.  Pat Snedden's talk was the most inspiring of the day.  He is so passionate about lifting our learners out of subsistence to capital builders.  I think Pat Snedden gave me the kick I needed to ensure that I am constantly doing my best and seeking ways to improve my teaching, because it is what my learners deserve.


I also used Twitter when I heard something which resonated with me.  Here is a collation of my tweets from the Hui.

Friday, 1 July 2016

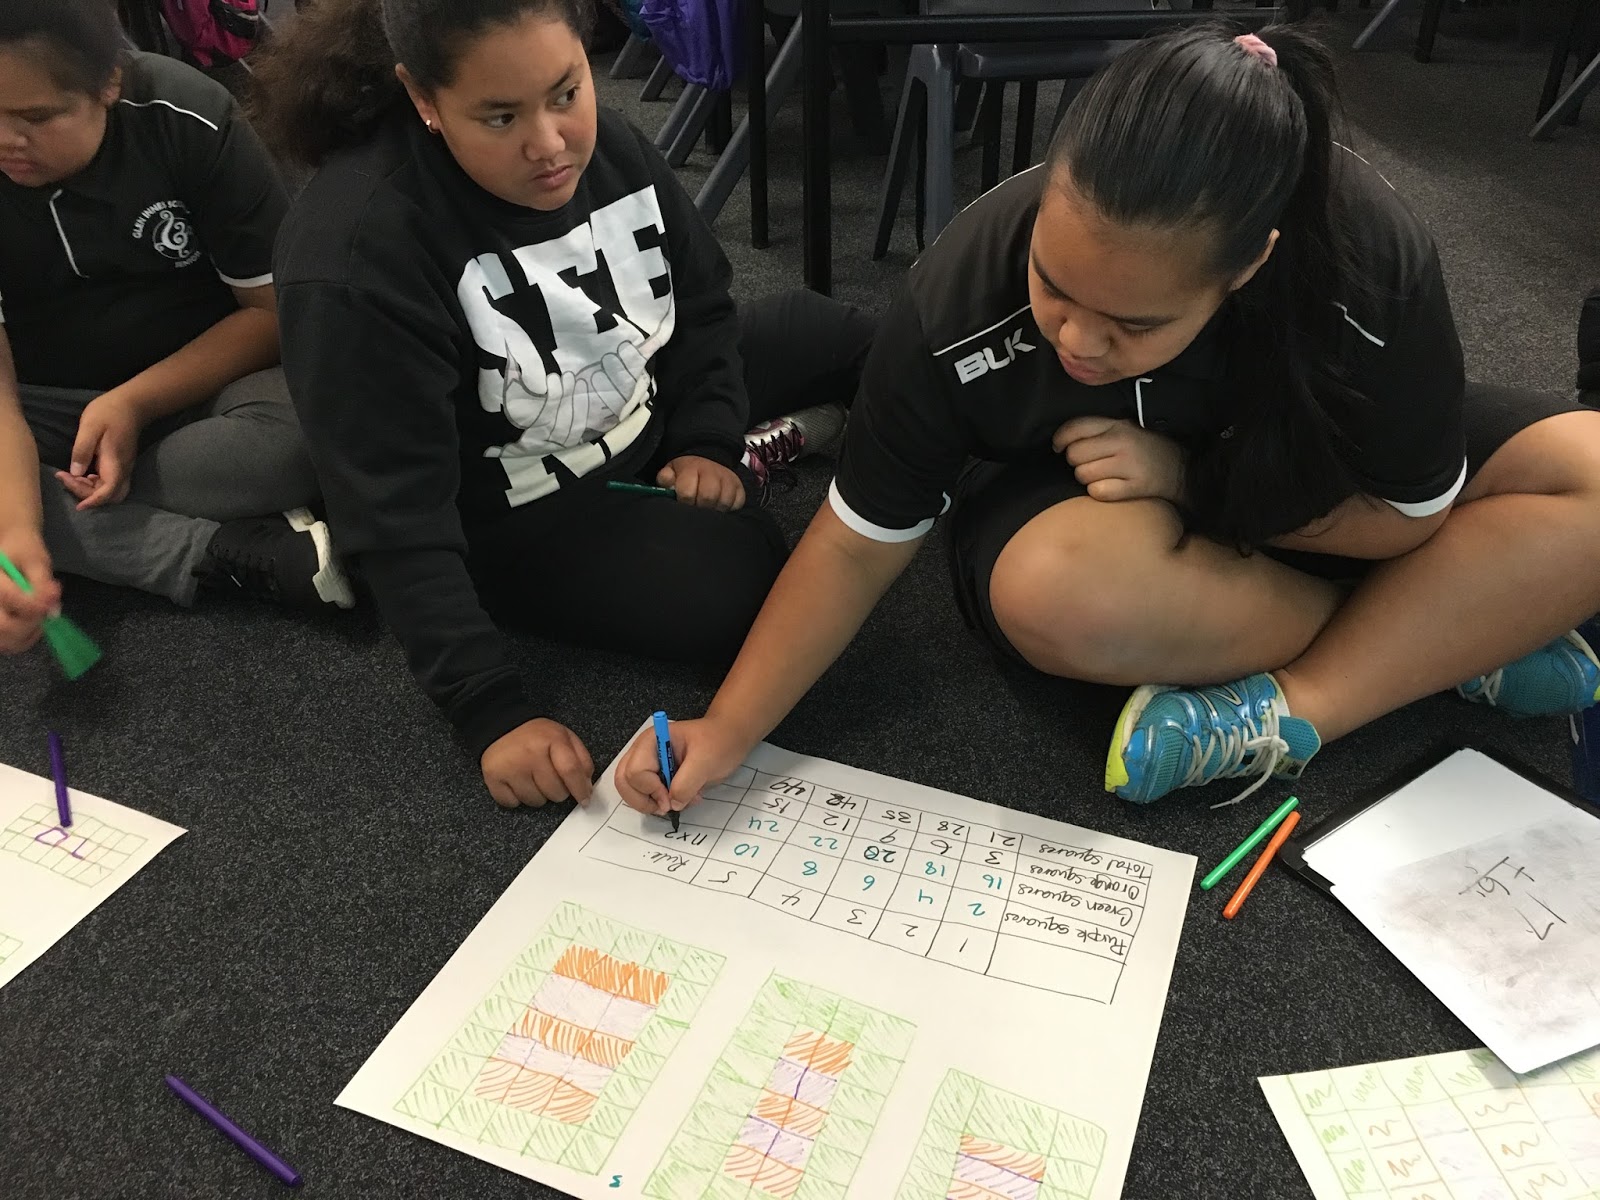
Maths: Playing With Patterns 2.0

This week I have been continuing to extend my learner's understanding of algebraic patterns and rules.  It has been so awesome watching my learners confidence grow as they became more familiar with the process of finding a rule for a pattern.  What I also noticed is the level of engagement and enthusiasm of my learners.  The kids were hooked in and loving the challenges, as I gradually provided less support and created more complex patterns.  Also, learners who were quick to find the rules were able to help explain and teach the other group members, which was great to see. 


I had continued to use materials when teaching my lessons, which I think contributed to the level of engagement and enthusiasm.  The learners were able to notice patterns as they recreated the patterns made out of post-it notes and felt pens.  I sat back and listened to the learners and noticed that as they were recreating the patterns they were discussing what they were noticing about the rules. I think that these discussions strengthened their understanding of algebraic patterns and rules.


At the end of my guided lesson on Tuesday my learners were tasked with the challenge of creating their own algebraic rules and patterns.  This allowed learners to use what they had learnt over the past two weeks and apply it in a new situation.  They had to think carefully when creating the patterns as they had to make sure that it would fit with their rules.


Next week I will extend my learners further, by teaching them level four algebra. I will continue to use hands-on methods of teaching as I have found that this is really effective with my learners.


Saturday, 28 May 2016

Hundreds of Photos: Stop Motion

Today was quite possibly the best Digital Immersion day I have had to date.  We were set with the task of creating a stop motion movie to teach our learners an idea or concept.  I chose to create a stop motion based on beach safety and rips, as it will fit into our aquatics inquiry.  


Whilst the movie doesn't look like much, it took a lot of planning, creating and editing!  An important lesson I learnt is if you are using a newer model iPhone, take the 'live photo' capability off before you start taking pictures.  I got a big shock when I uploaded my photos onto my mac and discovered every image was a 3 second clip!  But with some playing around I found a way to turn the live photo off and upload it using iPhoto Library (instead of the Photos app that pops up automatically).


Creating my backdrop


To create this stop motion I first created my beach scene by taking photographs of my 'waves' crashing onto the shore.  After uploading the images to iMovie, I changed the duration of each image and saved it as a file.  I then created a new iMovie and imported the clip of my waves crashing. Next, I copied the clip, and changed the second one to 'reverse', as I wanted the waves to roll in and out.  Then I copied the two parts and pasted it numerous times so that the waves would be continuously rolling in and out throughout my clip. Then I saved this as Beach Scene.


So. Many. Photos!


Next came the task of taking photographs of my characters with speech bubbles.  This took a lot of time.  I first created my 'green screen' background and foreground.  Next I wrote out all the speech bubbles.  Following that, I began taking photographs of my characters and the speech bubbles. I took over 200 photos, making slight movements of my characters and the speech bubbles.  After this I uploaded my images from my phone onto my computer, and then onto iMovie.  


I then had to adjust the speed of some of my photographs.  This took a lot of time because some of my speech bubbles had a lot in them, so I needed to make sure my learners would have enough time to read them.  After this, I saved the iMovie and labelled it 'Green screen'.


Next I had to put it all together.  I created another iMovie and imported the Green Screen and Beach Scene files.  I placed the Green Screen file on top of the Beach Scene, and changed the overlay to 'Green/Blue Screen'.  At times you could see the creases in the paper of my background/foreground and stick I used for the speech bubble, so I had to fix this using the eraser tool. Lastly, I added a sound clip.


And it's finished!


There are a few things I am unhappy with (like the occasional finger and watch strap making an appearance on screen and that I didn't quite place the green screen and characters in the perfect place), but overall I am pretty pleased with how it turned out. It was lots of fun and I thoroughly enjoyed the challenges that arose when creating a stop motion movie.


Enjoy