Friday, 1 July 2016

Maths: Playing With Patterns 2.0

This week I have been continuing to extend my learner's understanding of algebraic patterns and rules.  It has been so awesome watching my learners confidence grow as they became more familiar with the process of finding a rule for a pattern.  What I also noticed is the level of engagement and enthusiasm of my learners.  The kids were hooked in and loving the challenges, as I gradually provided less support and created more complex patterns.  Also, learners who were quick to find the rules were able to help explain and teach the other group members, which was great to see. 


I had continued to use materials when teaching my lessons, which I think contributed to the level of engagement and enthusiasm.  The learners were able to notice patterns as they recreated the patterns made out of post-it notes and felt pens.  I sat back and listened to the learners and noticed that as they were recreating the patterns they were discussing what they were noticing about the rules. I think that these discussions strengthened their understanding of algebraic patterns and rules.


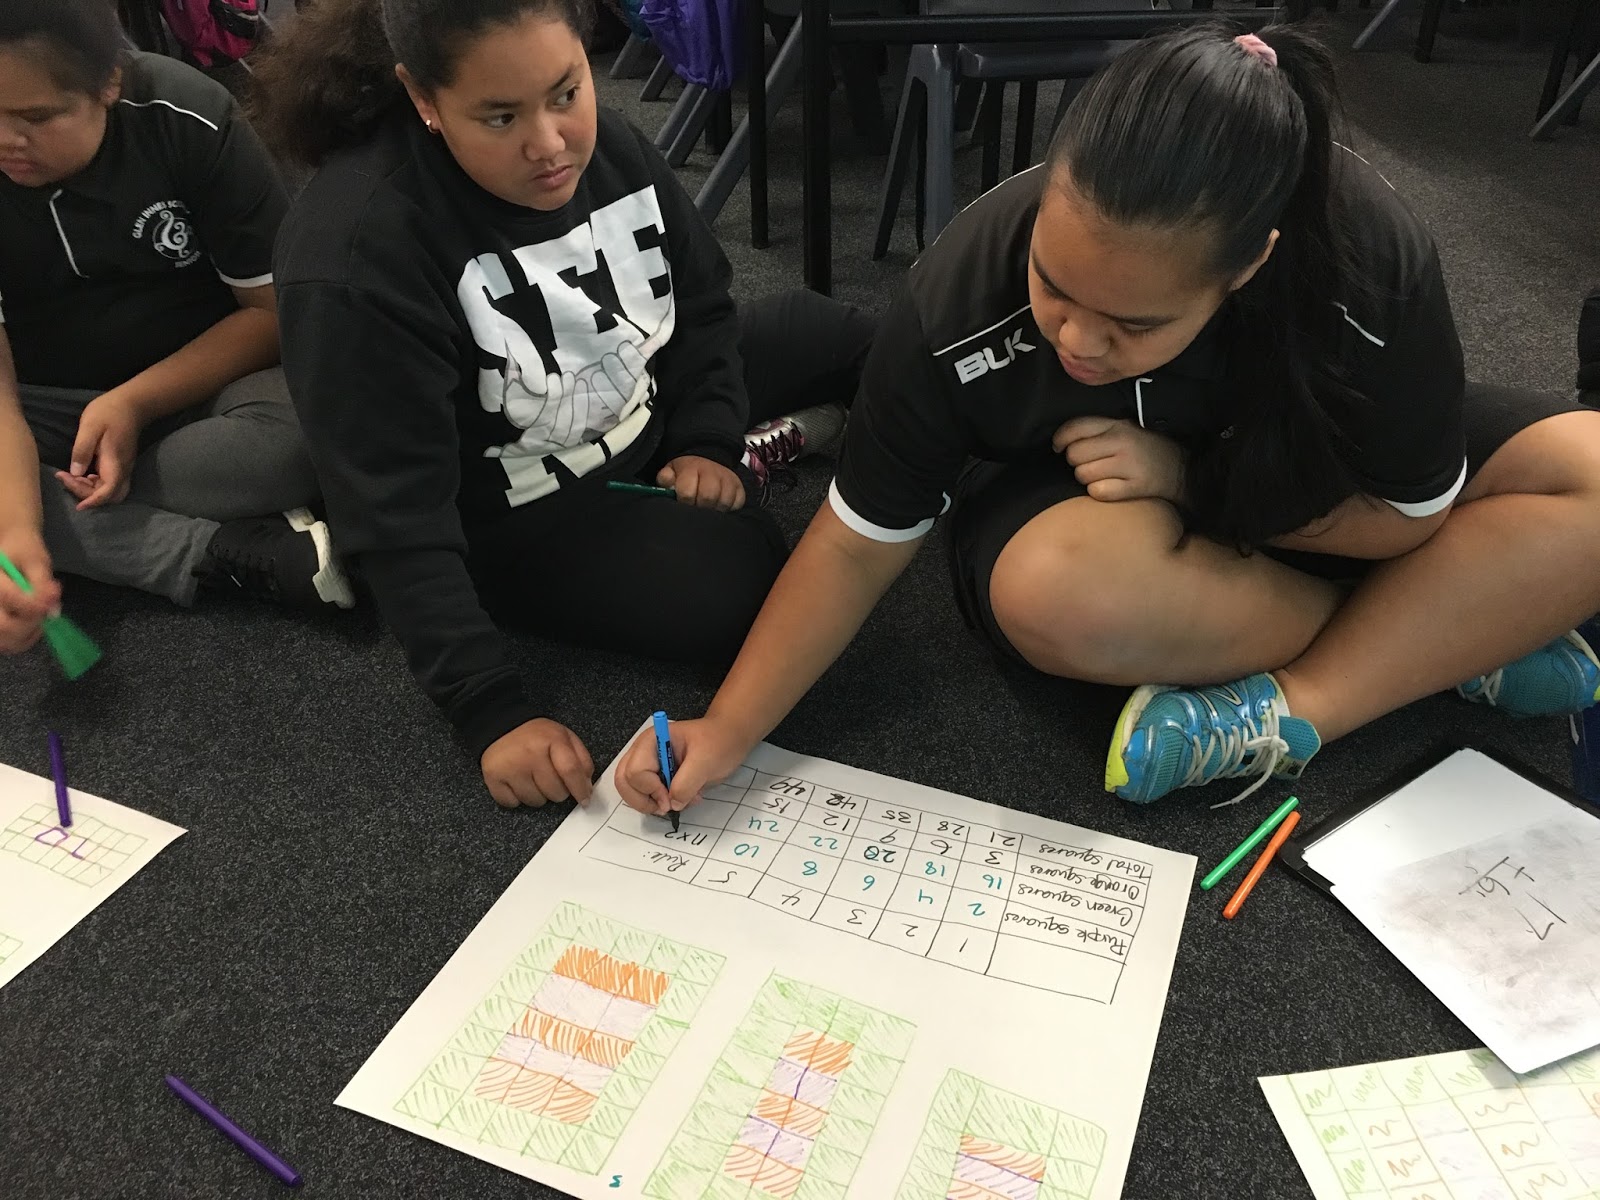


At the end of my guided lesson on Tuesday my learners were tasked with the challenge of creating their own algebraic rules and patterns.  This allowed learners to use what they had learnt over the past two weeks and apply it in a new situation.  They had to think carefully when creating the patterns as they had to make sure that it would fit with their rules.


Next week I will extend my learners further, by teaching them level four algebra. I will continue to use hands-on methods of teaching as I have found that this is really effective with my learners.


Saturday, 25 June 2016

Getting in front of a camera

Turns out it was quite a difficult task for me...


The digital immersion days leading up to this week we have created stop-motions, RSA animates, photo collages and multi-modal sites.  Today however we swapped our position from behind the camera to in front, as we began the task of creating our term 2 MDTA reflection videos. This was much harder than I had anticipated! 


Armed with some notes on what I would say about each section, Juliana and I set off to Point England Reserve to begin filming.  We hit our first road bump when we came to the realisation that we only had an iPhone and an iPad... No tripod or microphone or camera!  So then came the task of creating something to hold the iPad on.  We created a ridiculous stack of bags and laptop cases. Although it looked a little precarious it actually worked! But the iPad died and we couldn't get our laptops to charge it!  We decided to try our best to hold the iPhone stable and film that way.  This was another challenge! It was pretty hard to hold your arms still for over half an hour!


After filming Juliana's reflection, it was my turn.  This was a huge challenge for me! I am quite camera shy so I completely forgot everything I wanted to say.  I had chosen to not read from my notes as I wanted the interview to look authentic, and not rehearsed, however looking back a few bullet points may have been ideal.  


After watching the other MDTA teacher's films I realised I missed an awful lot in my reflection.  Manaiakalani and the MDTA is quite complex, there is so much to it and I feel I did not do Manaiakalani and the MDTA justice.  This weekend I am hoping to re-film and use bullet points.  Fingers crossed it still will look authentic. 

Wish me luck... I may need it!


This happened about 50 times

Thursday, 23 June 2016

Maths: Playing with Patterns

This week in mathematics I am have been teaching algebraic patterns and rules to the the higher level students in my classroom. Figuring out patterns and rules can be quite tricky. Even I am not the most confident when it comes to upper primary mathematics, especially algebra.  Therefore I decided to make my lessons hands-on, so the learners could physically make the patterns.  It was my hope that by making the 1st, 2nd, 3rd and 4th phase of a pattern, they would begin to notice patterns and make connections to algebraic thinking.  


We started off with determining the number of sticks used in a phase of a pattern.  We began with a triangle pattern.  The students quickly noticed that the number of sticks were increasing by 2, however this was not enough to create the 'rule'.  After the students tested out their theories, I illustrated that the triangles could be split into groups of two, with one extra stick left over.  Seeing the connection between the broken up sticks and the number of triangles helped them to notice the rule, n= (nx2) +1. After identifying the rule the learners were able to predict the number of sticks needed for the 8th, 27 and 38th pattern.


Following this, we moved on to a square pattern. I prompted the learners to think back to how we split up the triangles, and think about how they could split up the squares in a similar way.  Some of the learners instantly 'saw' how they could split up the squares, whilst some tried other ways.  This prompted discussions on why the learners chose to break the squares the way they did, and whether it would give us a rule for the number of sticks.  This lead them to discover that the sticks should be split into groups of 3, with 1 left over; giving the rule n = (nx3) +1.  Discussion was an important element of the lesson as it allowed learners to share their thoughts and justify their answers


I was surprised with how fast my learners were identifying the sequences and rules of the patterns, so I posed one more pattern to my learners.  It was in the shape of a house, with 6 sticks. Most of the learners quickly figured out a rule to count the number of sticks in the sequence.

Following this my learners created a DLO that teaches someone else about calculating rules for triangle and square path patterns. It was the first time that they had created a DLO in maths, but they did very well.  Here are two examples of the DLOs created after this lesson.  You can visit their blog posts by clicking on the images


My learners grasped the concept of finding a rule really well. I am looking forward to challenging my learners with some more complex patterns and rules.Next I will move onto more complex patterns and get them to create their own patterns that follow an algebraic rule.  

Monday, 20 June 2016

Health & Safety PD

Today during our staff meeting we had Maddie Worker  from ADHB come in and chat with us about Child Protection.  This was a really worthwhile PD session as a lot of questions were answered and protocols were clearly explained.  


It is so important for teachers to recognise and respond to the signs of trouble in our learners lives.  Students spend a lot of their time at school so teachers may observe that something does not seem right with a learner.  I feel teachers have the responsibility to ensure their learners are safe and happy and need to to speak up if they notice that their learner may be in an unsafe environment at home. It can also be hard when confronted with the realisation that a student is in fact in an unsafe environment at home, so it was really helpful to be informed how to maintain effective documentation.


This PD session made me feel much more confident about how to identify signs of abuse (physical, mental and emotional), what steps to take to ensure I document information correctly and how to ensure my learners are getting the help they need.  Unfortunately I may need to use this knowledge during my time as a teacher, so it is very important that I know what to do to ensure my learners have a safe, happy and loving home lives.

Here is a link to the doc I took during the PD session.

Wednesday, 15 June 2016

A new chapter


Monday marked the beginning of a new chapter of my teaching career, as I started in a new school.  Leading up to this day I had so many wonderings whizzing through my mind. So many new experiences and faces were approaching.  A new school, new class, new students, new colleagues and new mentor.  However I have quickly adjusted to my new school and am loving it!  The learners are fantastic and the staff are very supportive.


Glen Innes School is a decile 1A school situated in the heart of Glen Innes.  The schools roll is just over 200, and caters to learners from years 1 - 8. As with other Manaiakalani schools, GIS uses digital tools to accelerate their learners achievement.  The juniors use iPads and the seniors use netbooks. I will be co-teaching in a year 7 & 8 class with my mentor teacher, Manor Ramkolowan.  


Today a pōwhiri was held to welcome me to the school.  A pōwhiri is a Māori welcoming ceremony involving speeches, dancing, singing and the hongi.  Previously I have only attended one pōwhiri before, so it was quite the experience having pōwhiri to welcome me.  Glen Innes School has held 4 pōwhiri's during the past year to welcome new staff members and organisations to the school.  Jono Hendricks, the principal at GIS, had decided to do this in response to the community we are situated in.  It is a great opportunity for learners and teachers to demonstrate their responsiveness and respect towards Maori culture and protocols.  The students involved did an amazing job. They were strong and confident in their roles, which made the ceremony powerful.  


I am looking forward to continuing to immerse myself in Glen Innes School and its wider community.


Tuesday, 7 June 2016

OnAir


During this weeks Digital Immersion we explored the Manaiakalani Google Class OnAir site.  We were lucky enough to have Matt Goodwin, one of the teachers taking part in Manaiakalani Google Class OnAir, come in for a chat about what it entails.  We were also able to provide feedback and feedforward regarding the overall site and individual teachers.  


Class OnAir is a site where Manaiakalani teachers share their classrooms and lessons online to a global audience.  They demonstrate Manaiakalani's 'Learn, Create, Share' pedagogy and provide insight to how Manaiakalani teachers teach.  By clicking on the faces of the teachers, you can find links to lessons with videos, lesson plans and evaluations.  Moreover, there are links to the students' blogs and Google Documents.

Each teacher's site layout is similar and easy to follow.  You can access the teachers inquiry blog, class blog and class site from every page, as all teachers have used a similar header to display buttons.  Scrolling down the page you will find links to lessons as well as the learners blogs.  I found it easier to have a quick read through the teachers lesson plan before watching the clip.  It is important to remember that the clip only captures a segment of the lesson, so it is best to read the lesson plan to gain a better understanding of the clip.


The teachers that have opened their classrooms and teaching practice to the world are extremely brave!  It makes me think back to university and the stresses that would come when we had our visiting lecturers observing us.  I cannot imagine recording my lessons and publishing them for the world to see!  However these teachers have done an awesome job and have created some great lessons for their learners


Saturday, 28 May 2016

Hundreds of Photos: Stop Motion

Today was quite possibly the best Digital Immersion day I have had to date.  We were set with the task of creating a stop motion movie to teach our learners an idea or concept.  I chose to create a stop motion based on beach safety and rips, as it will fit into our aquatics inquiry.  


Whilst the movie doesn't look like much, it took a lot of planning, creating and editing!  An important lesson I learnt is if you are using a newer model iPhone, take the 'live photo' capability off before you start taking pictures.  I got a big shock when I uploaded my photos onto my mac and discovered every image was a 3 second clip!  But with some playing around I found a way to turn the live photo off and upload it using iPhoto Library (instead of the Photos app that pops up automatically).


Creating my backdrop


To create this stop motion I first created my beach scene by taking photographs of my 'waves' crashing onto the shore.  After uploading the images to iMovie, I changed the duration of each image and saved it as a file.  I then created a new iMovie and imported the clip of my waves crashing. Next, I copied the clip, and changed the second one to 'reverse', as I wanted the waves to roll in and out.  Then I copied the two parts and pasted it numerous times so that the waves would be continuously rolling in and out throughout my clip. Then I saved this as Beach Scene.


So. Many. Photos!


Next came the task of taking photographs of my characters with speech bubbles.  This took a lot of time.  I first created my 'green screen' background and foreground.  Next I wrote out all the speech bubbles.  Following that, I began taking photographs of my characters and the speech bubbles. I took over 200 photos, making slight movements of my characters and the speech bubbles.  After this I uploaded my images from my phone onto my computer, and then onto iMovie.  


I then had to adjust the speed of some of my photographs.  This took a lot of time because some of my speech bubbles had a lot in them, so I needed to make sure my learners would have enough time to read them.  After this, I saved the iMovie and labelled it 'Green screen'.


Next I had to put it all together.  I created another iMovie and imported the Green Screen and Beach Scene files.  I placed the Green Screen file on top of the Beach Scene, and changed the overlay to 'Green/Blue Screen'.  At times you could see the creases in the paper of my background/foreground and stick I used for the speech bubble, so I had to fix this using the eraser tool. Lastly, I added a sound clip.


And it's finished!


There are a few things I am unhappy with (like the occasional finger and watch strap making an appearance on screen and that I didn't quite place the green screen and characters in the perfect place), but overall I am pretty pleased with how it turned out. It was lots of fun and I thoroughly enjoyed the challenges that arose when creating a stop motion movie.


Enjoy